Owning an RV opens the doors to an exciting world of adventure and travel. However, just like any vehicle, it requires regular maintenance to keep it looking new and performing at its best. RV detailing is not just about making your motorhome shine; it’s about protecting its exterior and interior, ensuring longevity, and maximizing your investment. In this article, we’ll explore the essential RV detailing secrets, providing practical tips for maintaining a pristine look and long-lasting protection. Additionally, we’ll dive into the importance of a detailing kit for RVs and how it can help you achieve professional-level results on your own.
The Importance of RV Detailing
RV detailing goes beyond simple cleaning. It’s an in-depth process designed to maintain the vehicle’s appearance, enhance its durability, and protect it from the elements. While routine cleaning may help remove dust and dirt, RV detailing focuses on deep cleaning, waxing, and protection to prevent damage from sun exposure, rain, road salts, and other environmental factors.
For an RV, neglecting detailing can lead to the deterioration of paint, upholstery, and surfaces, diminishing the overall value of your vehicle. Regular detailing keeps your RV looking like new and preserves its resale value. Whether you use your RV for weekends away or full-time living, detailing will ensure it remains in top condition for years to come.
Step-by-Step Guide to RV Detailing
RV detailing is a multi-step process that requires the right tools, products, and techniques. By breaking it down into manageable tasks, you’ll achieve a professional-level result and prolong the life of your vehicle.
1. Exterior Cleaning
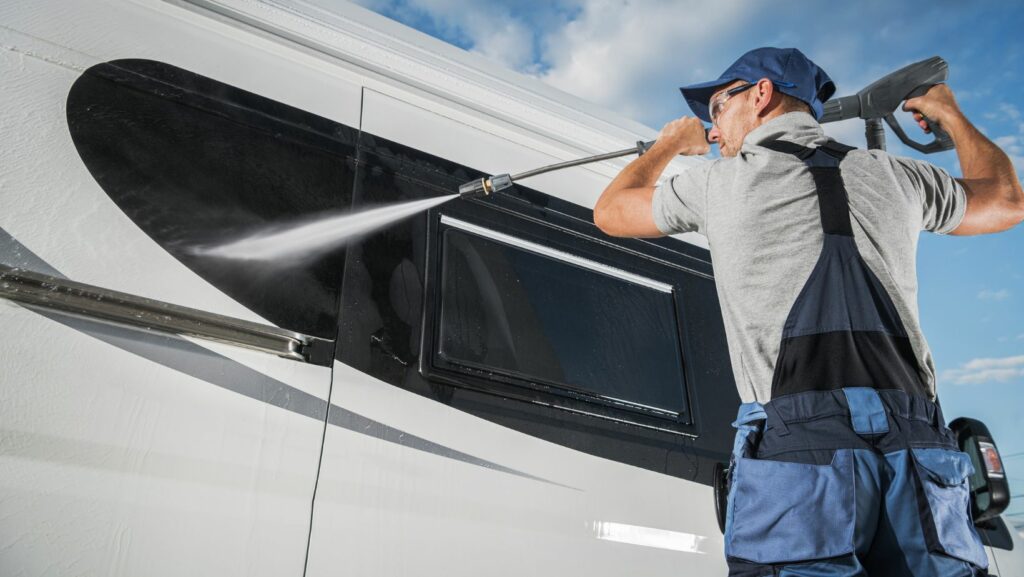
The first step in detailing your RV is to tackle the exterior. Over time, your RV’s surface will accumulate dirt, road grime, bugs, bird droppings, tree sap, and more. These substances can damage the paint and finish if not cleaned properly. Here’s how to do it right:
Washing
Use a gentle, pH-balanced soap specifically designed for RVs. Avoid using harsh household cleaners, as these can strip the wax and damage the paint. Start by rinsing the RV thoroughly to remove loose dirt. Use a microfiber cloth or a soft wash mitt to scrub the surface, starting from the top and working your way down. This helps to avoid reintroducing dirt to clean areas.
Bug and Tar Removal
Insects and tar can be a major nuisance, especially during road trips. Specialized bug and tar removal sprays work wonders. Apply the product to the affected areas and let it sit for a few minutes before wiping it away with a microfiber towel. Be sure to wash the area afterward to remove any residue.
2. Waxing for Protection
After cleaning the exterior, the next step is to apply a high-quality RV wax. Waxing is essential for providing a protective layer against UV rays, water spots, and other environmental elements. It also gives the RV a glossy, polished appearance.
Choose a wax formulated for RVs, as these products are designed to work on the specific materials and finishes found on RVs.

Apply the wax in small sections using an applicator pad, and buff it off with a clean microfiber towel. Always follow the manufacturer’s instructions for the best results.
3. Detailing the Wheels and Tires
The wheels and tires of an RV can easily accumulate grime and brake dust, which can lead to premature wear and tear. Clean the wheels with a specialized cleaner, making sure to remove all dirt and grease. To keep the tires looking like new, apply a tire protectant designed for RVs. This product will help prevent cracking and fading caused by UV exposure.
4. Cleaning Windows and Mirrors
Windows and mirrors on your RV can get dirty quickly, especially if you’re traveling on dusty roads or through inclement weather. Use a glass cleaner specifically designed for RV windows to avoid streaks and damage. A microfiber towel is also a great tool to ensure a smear-free shine. For mirrors, you can use the same glass cleaner, but be sure to wipe them down thoroughly to avoid any residue.
5. Roof and Awning Maintenance
Many RV owners forget about the roof and awning, but these areas require just as much attention as the rest of the exterior. The RV roof is exposed to harsh weather conditions, including rain, sun, and even snow. Clean the roof using an RV-specific roof cleaner, and be sure to inspect it regularly for leaks or damage. For awnings, a mild soap and water solution can help remove dirt and mold, keeping them in top condition.
6. Interior Cleaning and Detailing
The interior of an RV is just as important to clean and maintain as the exterior. Because RVs are often compact, dirt and debris can accumulate quickly. Here’s how to tackle the interior:
Vacuuming
Start by vacuuming all floors, including carpets and upholstery. A handheld vacuum can be used to clean seats and hard-to-reach areas. Don’t forget to clean the mattress, cushions, and behind furniture.
Surface Cleaning
Use an all-purpose cleaner to wipe down hard surfaces, including countertops, tables, and cabinetry. Be gentle when cleaning delicate areas such as wood finishes or leather. Always use a soft cloth or microfiber towel to avoid scratches.
Upholstery and Fabric Care
RV seats, couches, and curtains are subject to wear and tear over time. Use a fabric cleaner designed for RV upholstery to keep the fabric fresh and stain-free. For leather seats, use a leather cleaner and conditioner to maintain their softness and prevent cracking.
7. Protecting the Interior
In addition to cleaning, protecting your RV’s interior is essential. This includes using fabric protectants on upholstery and carpets to prevent staining and spills. Window tinting can help protect the interior from UV rays, keeping the inside cooler and preventing fading of upholstery and finishes.
Detailing Kit for RVs: Your Essential Tool for the Job
Investing in a detailing kit for RVs can make the whole process much easier and more effective. A good detailing kit includes all the necessary tools and products to perform thorough cleaning, waxing, and protection tasks. Here’s what a high-quality RV detailing kit typically includes:
1. Cleaning Solutions
A comprehensive detailing kit will come with cleaning solutions tailored to different parts of the RV. You’ll typically find products for washing the body, cleaning windows, removing bugs and tar, and a separate cleaner for upholstery.
2. Microfiber Towels and Applicator Pads
Microfiber towels are essential for preventing scratches while cleaning and polishing. A detailing kit for RVs will often include a set of these towels in various sizes, as well as applicator pads for applying wax and other treatments.
3. Brushes and Tools for Detail Work
A good kit will also include specialized brushes to reach tight spots, such as vents, wheels, and mirrors. Some kits even include a long-handled brush for cleaning the roof and other hard-to-reach areas.
4. Polish and Wax
Most RV detailing kits come with a premium wax or polish designed specifically for RV finishes. This wax will help create a protective layer on the RV’s exterior, preventing water spots and UV damage.
5. Tire and Wheel Care Products
For complete detailing, the kit will usually feature tire cleaners and protectants to keep the wheels looking brand new. These products help to preserve the rubber and prevent cracking, fading, and damage caused by UV rays.
6. Interior Care Products
Some detailing kits also include products for cleaning and protecting the interior, such as upholstery cleaners, leather conditioners, and all-purpose cleaners for hard surfaces. This makes it easier to maintain a clean and fresh interior without needing to buy separate products.
7. Protective Coatings
Some premium detailing kits even offer protective coatings that shield your RV’s paint from the elements, reducing the frequency of detailing needed. These coatings act as a barrier, ensuring your RV stays cleaner for longer.
By using a detailing kit for RVs, you’ll have the right tools and products at your disposal, saving you time and effort. It’s a simple and effective way to ensure that every part of your RV gets the care and attention it deserves.
Preventive Maintenance: Keeping Your RV Pristine Between Detailing
While regular detailing is crucial, there are several things you can do to maintain your RV’s cleanliness and protection between detailings. Here are some preventive maintenance tips:
1. Cover Your RV
Using a high-quality RV cover when your vehicle is not in use can protect it from dirt, debris, and weather damage. Covers can also shield your RV from UV rays, preventing fading and oxidation of the paint and finishes.
2. Regularly Check for Damage
Inspect your RV regularly for signs of wear and tear, such as cracks, leaks, or fading. The sooner you catch these issues, the easier (and cheaper) they are to fix.
3. Park in Shaded Areas
Whenever possible, park your RV in shaded areas to minimize exposure to the sun. This will help preserve the paint, prevent fading, and keep the interior cooler.

4. Use a Dehumidifier
Using a dehumidifier inside the RV, especially during long periods of non-use, will help prevent mold and mildew buildup. This is particularly important if you store your RV in a damp or humid environment.
Conclusion
RV detailing is a crucial part of maintaining your vehicle’s appearance and longevity. By following the steps outlined above and investing in a detailing kit for RVs, you’ll be well on your way to achieving a pristine look and protecting your RV for the long term. Regular detailing not only enhances the aesthetic appeal of your RV but also preserves its value, ensuring that it remains in excellent condition for years to come.
Remember, maintaining your RV doesn’t have to be a daunting task. With the right tools, a bit of effort, and some regular attention, you can keep your RV looking its best and ready for your next adventure.